What’s the perfect treat to serve at your Halloween party? These homemade Halloween Biscoff Pastries are a quick and easy dessert solution, made with flaky pastry and a rich Biscoff spread. Try making them for a family favorite weeknight dessert, Save this idea for your next spooky gathering.
Halloween Biscoff Pastries
Introduction
As the spooky season approaches, there’s no better way to get into the Halloween spirit than with a treat that’s both eerie and delicious. Introducing the Halloween Biscoff Pastries, a creative twist on traditional pastry desserts that combines the warmth of Biscoff cookies with the thrill of Halloween. These pastries are not only a feast for the eyes, with their vibrant orange and black colors, but also a delight for the taste buds, offering a perfect balance of crunch, spice, and sweetness. The best part? They’re incredibly easy to make, requiring just a few everyday ingredients and some basic kitchen magic. Whether you’re a seasoned baker or a culinary newbie, these Halloween Biscoff Pastries are the perfect project to undertake this autumn season.
Why This Works
- Flavor balance and ingredient accessibility: The combination of Biscoff spread, puff pastry, and seasonal spices like cinnamon and nutmeg creates a flavor profile that’s both familiar and exciting. Plus, all the ingredients are easily found in most grocery stores.
- Ease of preparation: Despite their impressive appearance, these pastries are surprisingly simple to make. The puff pastry simplifies the dough-making process, and the Biscoff spread adds flavor without needing to mix complicated fillings.
- Impressive results with minimal effort: The key to these pastries is in their presentation. With a little creativity in cutting out shapes and arranging toppings, you can create desserts that look like they came from a professional bakery, all with minimal fuss.
Key Ingredients
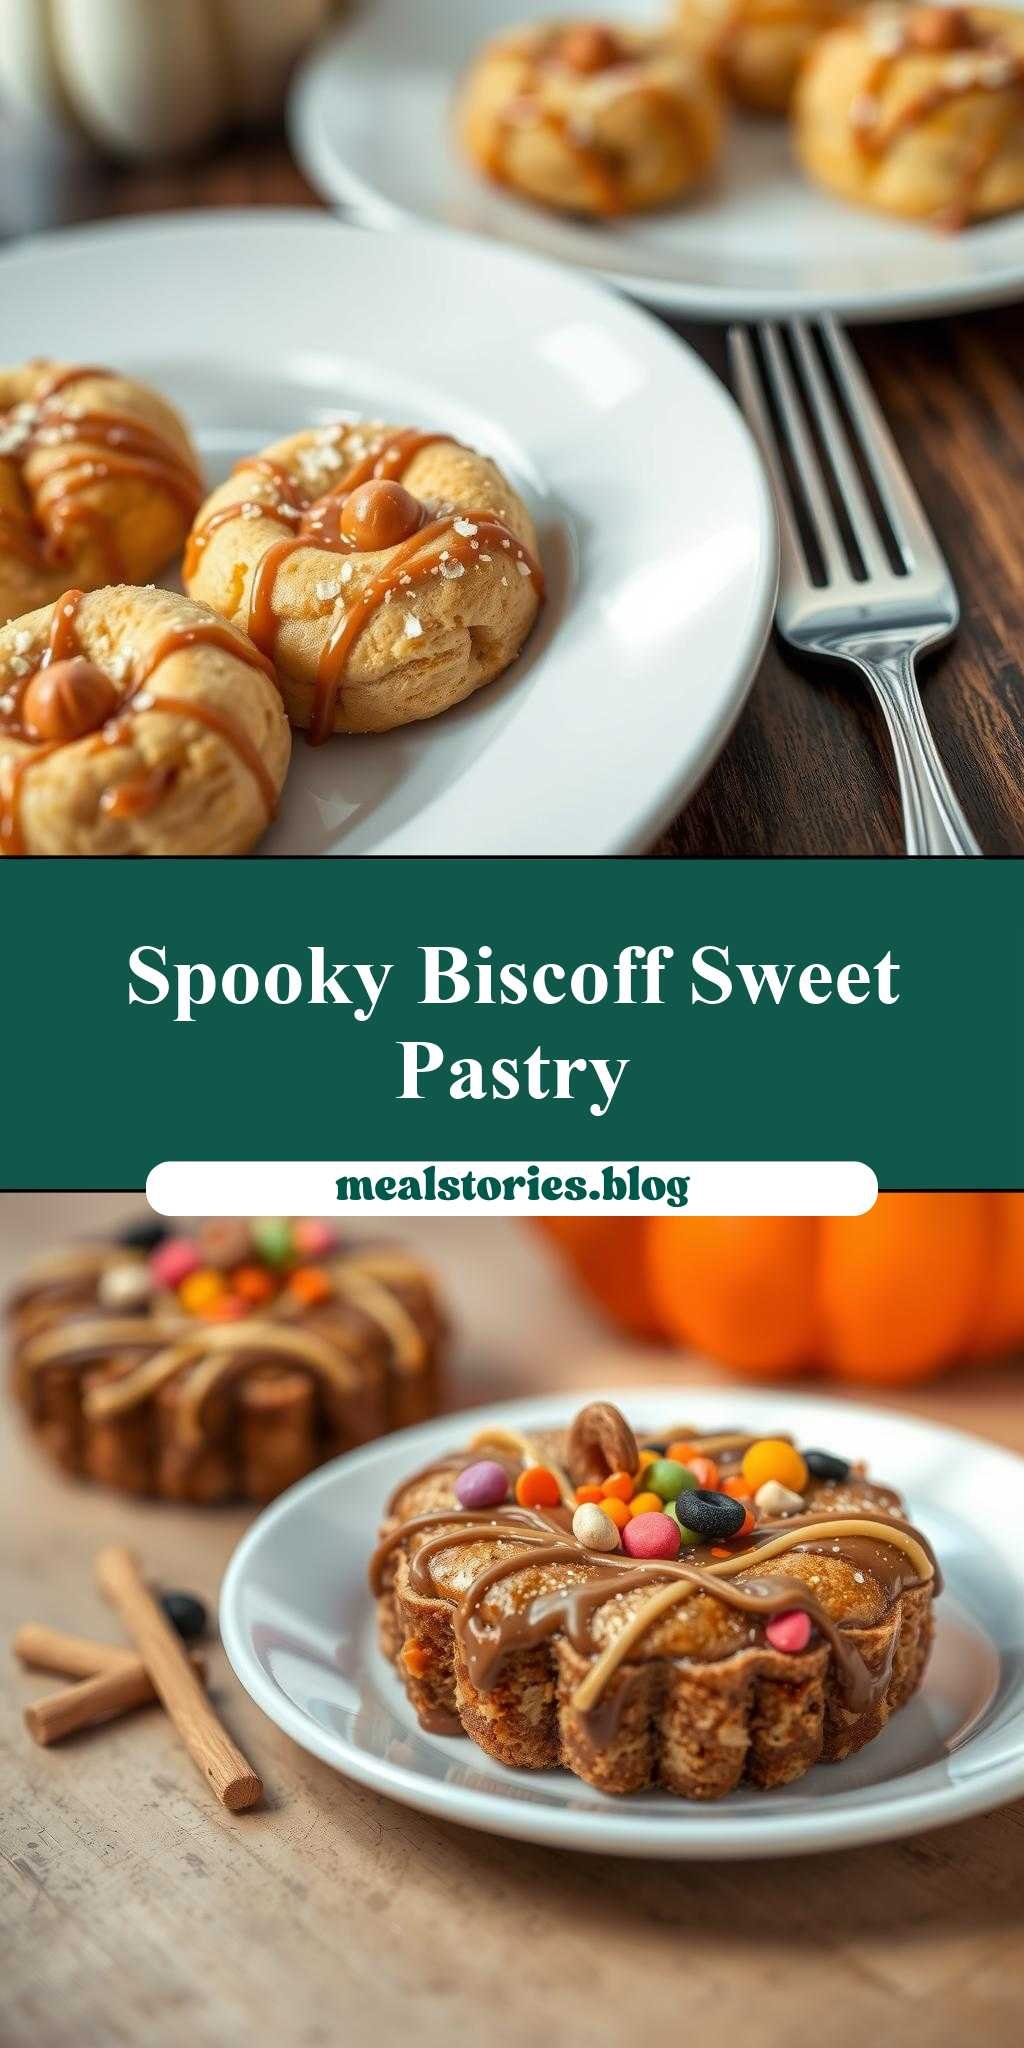
The foundation of these Halloween Biscoff Pastries lies in a few key ingredients. First, you’ll need a package of puff pastry, which provides the flaky, buttery base of the pastries. Next, Biscoff spread is essential for the filling, offering a rich, caramel-like flavor that pairs perfectly with the spices of the season. For the spices, cinnamon and nutmeg are staples, but feel free to experiment with other autumnal spices like ginger or allspice. Finally, for the toppings, you’ll want some orange and black frosting or glaze, along with any Halloween-themed sprinkles or edible decorations you like. For a gluten-free version, consider substituting the puff pastry with a gluten-free alternative, and always check the ingredients of your Biscoff spread and spices to ensure they meet your dietary needs.
Instructions
- Step 1: Begin by preheating your oven to 400°F (200°C). Roll out the puff pastry on a floured surface to a thickness of about 1/8 inch. Cut out shapes that fit your Halloween theme, such as bats, ghosts, or pumpkins. You can use cookie cutters for this step or get creative with a knife.
- Step 2: Place your pastry shapes on a baking sheet lined with parchment paper, leaving about 1 inch of space between each pastry. Spoon a small amount of Biscoff spread onto one half of each shape, leaving a 1/2 inch border around the edges. Fold the other half over the filling to create a triangle or square shape, pressing the edges to seal. Use a fork to crimp the edges for a decorative touch.
- Step 3: Brush the tops of the pastries with a little bit of egg wash (beaten egg mixed with a splash of water) to give them a golden brown color when they bake. If desired, sprinkle with a pinch of cinnamon or nutmeg for extra flavor and aroma.
- Step 4: Bake the pastries for 20-25 minutes, or until they’re golden brown. Allow them to cool on a wire rack for at least 10 minutes before glazing with orange and black frosting and decorating with your chosen Halloween toppings.
Handy Tips
- Make sure your puff pastry is thawed according to the package instructions to ensure it rolls out smoothly and evenly.
- Don’t overfill the pastries, as the Biscoff spread can melt and ooze out during baking.
- Experiment with different shapes and sizes to keep your Halloween spread interesting and varied.
Heat Control
For these pastries, maintaining the right oven temperature is crucial. Ensure your oven is at 400°F (200°C) for the flakiest, most tender results. It’s also important to keep an eye on the pastries as they bake; they can quickly go from perfectly golden to burnt. If you’re unsure, it’s better to err on the side of underbaking slightly, as the pastries will continue to cook a little after they’re removed from the oven.
Crunch Factor
The crunch factor in these Halloween Biscoff Pastries comes from the flaky puff pastry and any crunchy toppings you choose, like chopped nuts or sprinkles. To enhance the crunch, make sure your pastry is cold when it goes into the oven, and don’t overbake. For an extra crispy top, you can also try baking the pastries for an additional 2-3 minutes, though keep a close eye to prevent burning.
Pro Kitchen Tricks
- Use a pastry brush to apply the egg wash, as this will give you more control and help you achieve a smooth, even coat.
- For a professional finish, chill your filled and sealed pastries in the fridge for 10-15 minutes before baking. This helps them hold their shape and bake up with sharper edges.
- Consider using a silicone mat on your baking sheet instead of parchment paper for easier cleanup and to prevent the pastries from spreading too much.
Storage Tips
- These pastries are best served fresh, but they can be stored in an airtight container at room temperature for up to 2 days.
- For longer storage, consider freezing the baked and cooled pastries. Simply place them in a freezer-safe bag or container and store for up to 2 months. To serve, thaw at room temperature or reheat in the oven at 350°F (180°C) for a few minutes.
- When reheating, keep an eye on the pastries to ensure they don’t become too crispy or burnt.
Gift Packaging Ideas
If you’re planning to give these Halloween Biscoff Pastries as gifts, consider packaging them in decorative tins or jars filled with orange and black tissue paper. You can also wrap them individually in cellophane bags and tie with a ribbon, adding a gift basket or box filled with other Halloween treats for a more substantial gift. For a more rustic look, use brown paper bags with a handwritten note or a small drawing of a Halloween theme.
Flavor Variations
- Different spices: Try adding a pinch of ground ginger or allspice to your Biscoff spread for an extra depth of flavor.
- Creative toppings: Use your imagination with the toppings. Edible eyes, Halloween-themed sprinkles, or even a drizzle of caramel sauce can add a fun and creative touch.
- Ingredient swaps: For a chocolate version, use chocolate puff pastry or add cocoa powder to your Biscoff spread. You can also experiment with different types of cookie butter for unique flavor profiles.
Troubleshooting
- Texture problems: If your pastries turn out too dense, it might be because the puff pastry wasn’t thawed properly or was overworked. If they’re too crispy, they might have been overbaked.
- Ingredient replacements: If you can’t find Biscoff spread, look for another cookie butter or try making your own by blending cookies like speculoos with butter and powdered sugar.
- Over/undercooking signs: Keep an eye on your pastries as they bake. If they’re underbaked, they’ll be pale and soft; if they’re overbaked, they’ll be dark brown and hard.
FAQs
- Can I freeze it? Yes, you can freeze both the unbaked pastries and the baked and cooled ones. For unbaked, place them on a baking sheet, freeze until solid, then transfer to a freezer-safe bag or container for up to 2 months. Bake frozen pastries for an additional 2-3 minutes.
- Is it gluten-free? Traditional puff pastry contains gluten, but you can find gluten-free alternatives. Also, ensure your Biscoff spread and any additional ingredients are gluten-free.
- Can I double the recipe? Yes, you can easily double or triple this recipe. Just be sure to have enough baking sheets and space in your oven, as you’ll need to bake the pastries in batches to prevent overcrowding.
Conclusion
With these Halloween Biscoff Pastries, you’re not just making a dessert; you’re creating a experience. Whether you’re hosting a Halloween party, attending a potluck, or simply want to spice up your autumn baking, these pastries are sure to impress. Their unique flavor, combined with the fun of decorating them for the season, makes them a perfect project for both kids and adults. So don’t be afraid to get creative, experiment with new flavors and shapes, and most importantly, enjoy the process of making something truly special. Happy baking, and Happy Halloween!
Halloween Biscoff Pastries
A seasonal dessert combining the flaky goodness of puff pastry with the caramel-like flavor of Biscoff spread, perfect for Halloween.
🥘 Ingredients
👩🍳 Instructions
-
1Preheat oven to 400°F (200°C). Roll out puff pastry to about 1/8 inch thickness.
-
2Cut out Halloween-themed shapes. Spoon a small amount of Biscoff spread onto one half of each shape, leaving a 1/2 inch border.
-
3Fold the pastry over the filling, pressing edges to seal. Brush tops with egg wash and sprinkle with cinnamon or nutmeg if desired.
-
4Bake for 20-25 minutes, or until golden brown. Allow to cool before glazing with orange and black frosting and decorating with Halloween toppings.