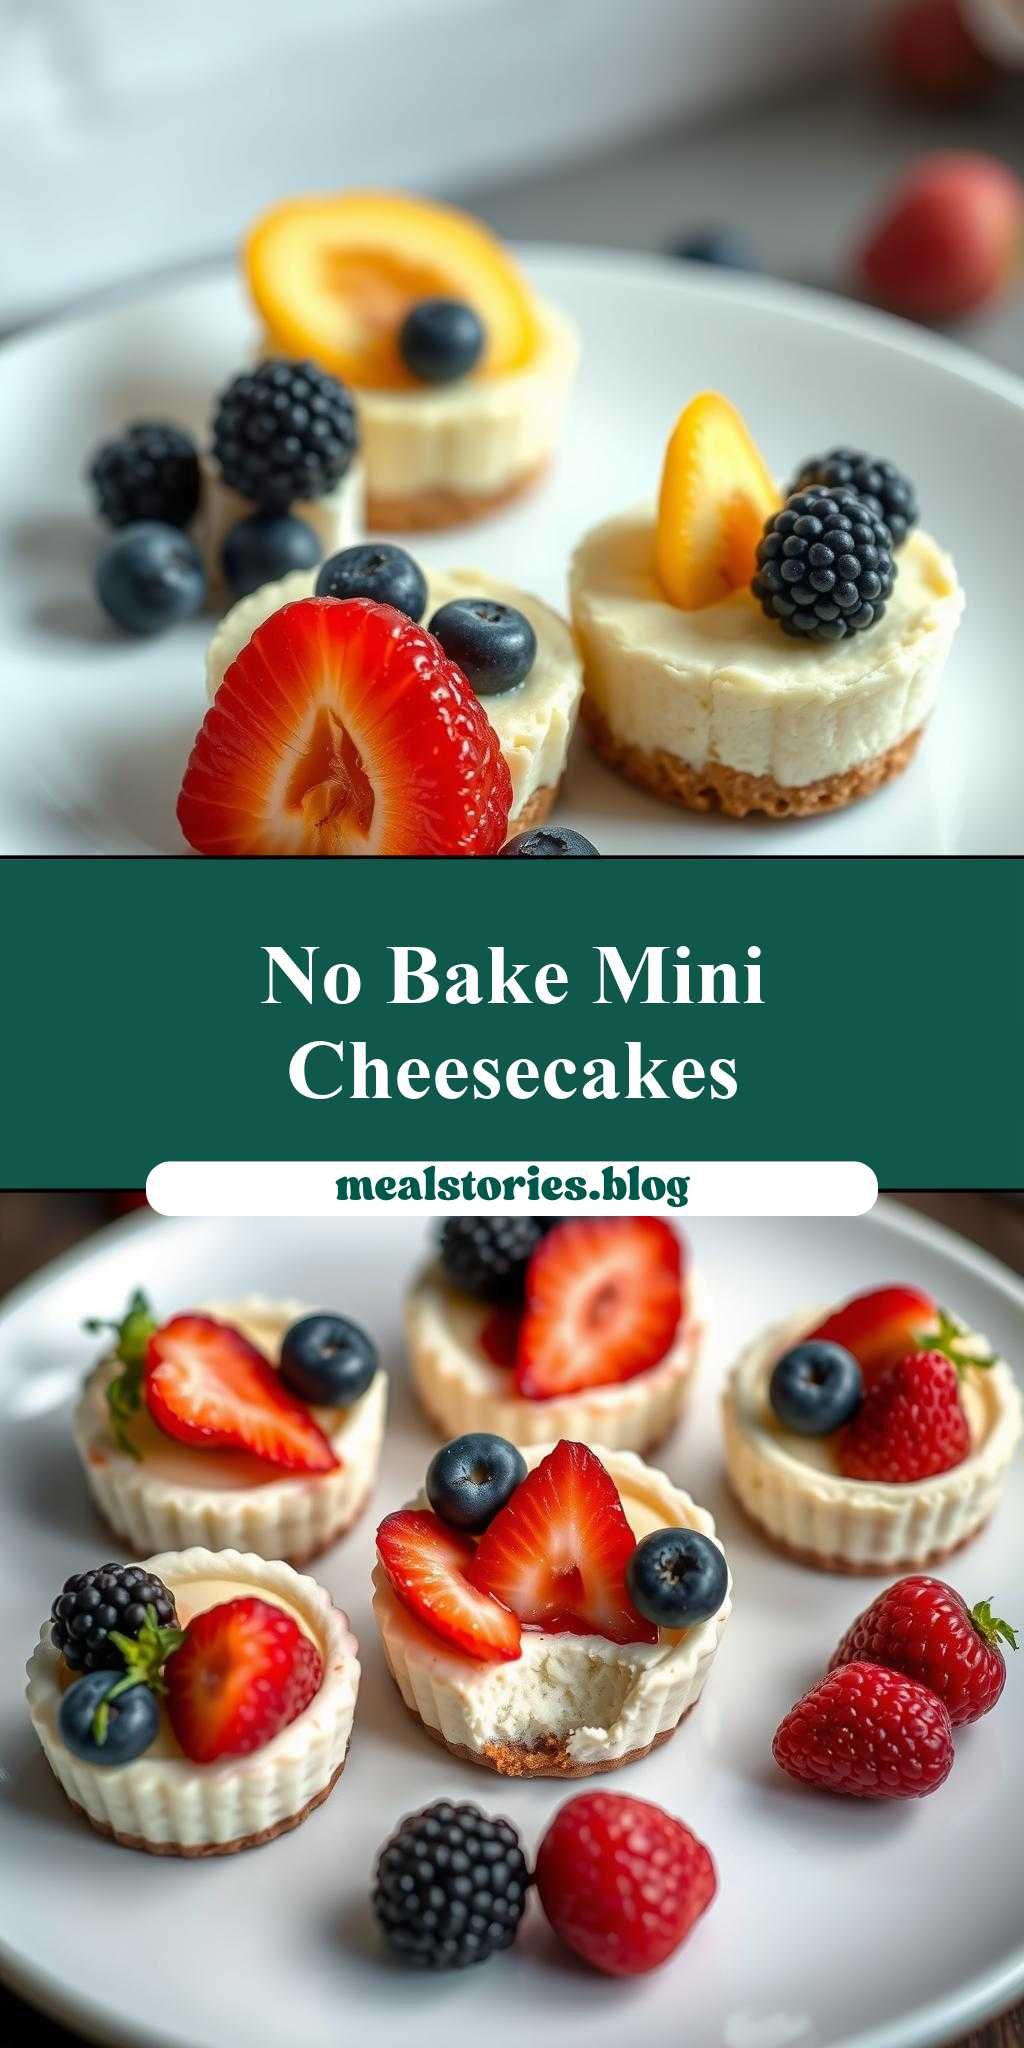
What’s the perfect dessert for a warm evening? These no bake mini cheesecakes with fresh fruit on top are a quick and easy homemade treat that’s sure to become a family favorite, made with a simple graham cracker crust and creamy filling. Save this idea for your next gathering or weeknight dinner dessert.
no bake mini cheesecakes with fresh fruit on top
Introduction
Indulge in the creamy sweetness of no-bake mini cheesecakes, perfectly topped with a burst of fresh fruit. This recipe is a testament to the magic of effortless baking, where everyday ingredients come together to create a dessert that’s as impressive as it is delicious. With the absence of baking, these mini cheesecakes are ideal for warm weather or for those who prefer to avoid the oven. The combination of a silky cheesecake base, a crunchy biscuit crust, and the vibrant freshness of fruit on top creates a flavor and texture experience that’s hard to resist. Whether you’re a seasoned baker or a beginner in the kitchen, this recipe offers a creative outlet with its endless possibilities for customization, making it a perfect treat for any occasion.
Why This Works
- Flavor balance and ingredient accessibility: The recipe strikes a perfect balance between tangy cheesecake, sweet fruit, and crunchy base, all made with easily accessible ingredients.
- Ease of preparation: The no-bake aspect simplifies the process, eliminating the need for precise oven temperatures and timings, making it accessible to all skill levels.
- Impressive results with minimal effort: Despite the simplicity of the preparation, the end result is visually appealing and sophisticated, perfect for gatherings or as a special treat.
Key Ingredients
The foundation of these no-bake mini cheesecakes includes a biscuit crust made from crushed biscuits mixed with melted butter, a cheesecake mixture of cream cheese, sugar, eggs, and vanilla extract, and a variety of fresh fruits such as strawberries, blueberries, or raspberries for topping. Practical substitutions can be made for the biscuits with other types of cookies or even nuts for a different texture, and various fruits can be used based on personal preference and seasonal availability. The cream cheese can be substituted with a lighter version or mixed with Greek yogurt for a healthier twist.
Instructions
- Step 1: Begin by preparing your crust. Crush the biscuits in a blender or place them in a plastic bag and crush them with a rolling pin until they are finely ground. Mix the crushed biscuits with melted butter until well combined. Press this mixture into the bottom of mini cheesecake molds or small cups.
- Step 2: Prepare the cheesecake mixture. In a large bowl, beat the cream cheese until smooth, then add the sugar and beat until combined. Beat in the eggs one at a time, followed by the vanilla extract. The mixture should be smooth and creamy.
- Step 3: Fill the prepared molds with the cheesecake mixture, leaving a small space at the top for the fruit. Refrigerate for at least 4 hours or overnight to set.
- Step 4: Just before serving, top each mini cheesecake with fresh fruit. You can use a single type of fruit or mix different types for a colorful and varied look. Serve chilled and enjoy!
Handy Tips
- Ensure the crust is evenly pressed to prevent it from becoming too thick in some areas. Also, don’t overmix the cheesecake batter, as this can lead to a dense cheesecake.
- For a firmer cheesecake, you can add a little more cream cheese or reduce the amount of sugar. Conversely, for a lighter texture, you might consider adding a bit of sour cream or Greek yogurt to the mixture.
- Avoid over-refrigeration, as this can cause the cheesecakes to become too firm. Ideally, they should be chilled but still creamy when served.
Heat Control
Since this recipe is no-bake, heat control is not a concern. However, it’s essential to note that the melting of the butter for the crust should be done carefully to avoid overheating, which can make the mixture too greasy. Simply melting the butter in short bursts in the microwave or over low heat on the stove should suffice.
Crunch Factor
The crunch in these mini cheesecakes comes from the biscuit crust. To enhance the crunch, you can toast the crushed biscuits in a pan over low heat for a few minutes before mixing them with the melted butter. This step adds a nutty flavor and a crunchier texture to the base.
Pro Kitchen Tricks
- For a smoother cheesecake, make sure all the ingredients are at room temperature before mixing. This ensures a uniform consistency and reduces the risk of lumps in the batter.
- To prevent the cheesecakes from sticking to the molds, lightly grease the molds with butter or cooking spray before pressing in the crust.
- Experiment with different extracts like lemon or orange to give the cheesecakes a unique flavor twist. A teaspoon of any extract can be added to the cheesecake mixture before refrigeration.
Storage Tips
- These mini cheesecakes can be stored in the refrigerator for up to 3 days. It’s best to top them with fruit just before serving to keep the fruit fresh.
- For longer storage, the cheesecakes without the fruit topping can be frozen for up to a month. Simply thaw in the refrigerator overnight and top with fresh fruit before serving.
- When storing, make sure the cheesecakes are covered to prevent them from drying out. Using an airtight container or wrapping them individually in plastic wrap is recommended.
Gift Packaging Ideas
These no-bake mini cheesecakes are perfect for gifting, especially for birthdays, holidays, or as a thank-you gesture. Consider packaging them in small, decorative jars or cups, topped with a layer of fresh fruit and a sprinkle of sugar. You can wrap the jars in colorful ribbons or add gift tags with personal messages for a more personalized touch. For a more rustic look, place the cheesecakes in small wooden crates or baskets, lined with parchment paper and decorated with fresh greenery.
Flavor Variations
- Different spices: Add a pinch of cinnamon, nutmeg, or cardamom to the cheesecake mixture for a unique flavor profile.
- Creative toppings: Besides fresh fruits, consider using caramel sauce, chocolate shavings, or toasted nuts as toppings for added texture and flavor.
- Ingredient swaps: Replace the biscuits with chocolate sandwich cookies for a chocolate crust or use different types of cheese like mascarpone for a richer cheesecake.
Troubleshooting
- Texture problems: If the cheesecakes are too soft, they might not have been refrigerated long enough. If they’re too hard, they might have been over-refrigerated.
- Ingredient replacements: Always consider the flavor and texture impact when substituting ingredients. For example, using a lighter cream cheese will result in a lighter cheesecake.
- Over/undercooking signs: Since this is a no-bake recipe, the concern is more about the setting of the cheesecakes. If they’re not set, refrigerate them for a longer period. If they’re too set, they might have been refrigerated for too long.
FAQs
- Can I freeze it? Yes, you can freeze the cheesecakes without the fruit topping for up to a month. Thaw overnight in the refrigerator and top with fresh fruit before serving.
- Is it gluten-free? Depending on the type of biscuits used for the crust, these cheesecakes can be made gluten-free by using gluten-free biscuits or alternatives like ground nuts.
- Can I double the recipe? Yes, the recipe can be easily doubled or tripled to make more mini cheesecakes. Just ensure you have enough molds and refrigeration space.
Conclusion
These no-bake mini cheesecakes with fresh fruit on top are a delightful dessert that combines ease of preparation with impressive results. With their creamy texture, crunchy base, and burst of fresh fruit, they’re perfect for any occasion. Feel free to experiment with different flavors and toppings to make the recipe your own, and don’t hesitate to share your creations with friends and family. Whether you’re a fan of classic desserts or looking for something new to try, this recipe is sure to become a favorite. So, go ahead, get creative, and indulge in the joy of no-bake baking!
no bake mini cheesecakes with fresh fruit on top
A creamy and refreshing dessert made with a no-bake cheesecake base, topped with fresh fruit, perfect for warm weather and effortless entertaining.
🥘 Ingredients
👩🍳 Instructions
-
1Prepare the crust by mixing crushed biscuits with melted butter and pressing into mini cheesecake molds.
-
2Prepare the cheesecake mixture by beating cream cheese, sugar, eggs, and vanilla extract until smooth.
-
3Fill the molds with the cheesecake mixture and refrigerate for at least 4 hours or overnight.
-
4Top with fresh fruit just before serving.