What makes brownies truly irresistible to you? For me, it’s the combination of rich chocolate and subtle sweetness in these homemade blue velvet brownies, made with cocoa powder and topped with a creamy cheesecake layer, perfect for a quick weeknight dessert – Save this idea
Blue Velvet Brownies
Introduction
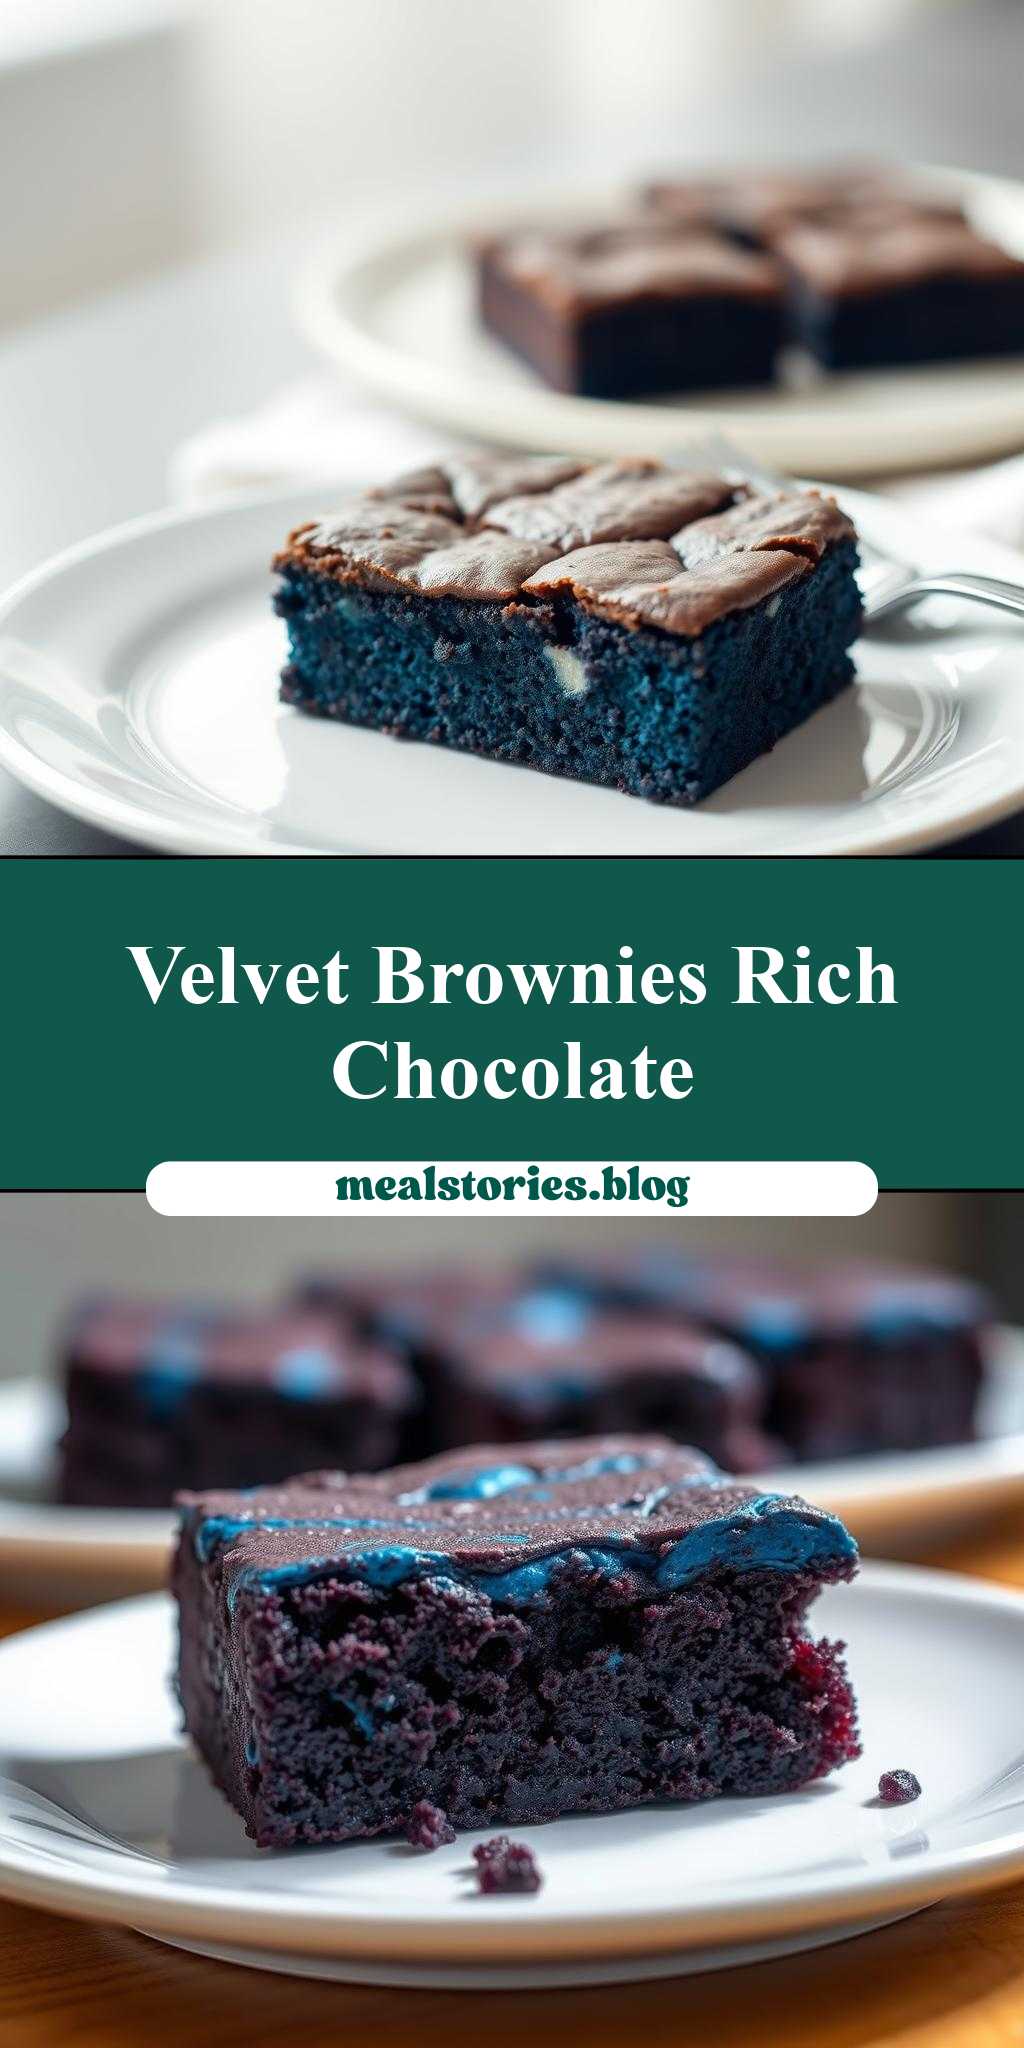
Imagine sinking your teeth into a rich, velvety brownie that’s as vibrant as it is decadent. The Blue Velvet Brownies recipe is a game-changer for anyone looking to elevate their dessert game without breaking a sweat. By combining the ease of everyday ingredients with a dash of creativity, you’ll be able to whip up a batch of these stunning brownies in under 30 minutes. The best part? They’re incredibly versatile, perfect for satisfying your sweet tooth, impressing friends at a dinner party, or even as a unique gift for the chocolate lovers in your life.
Why This Works
- Flavor balance and ingredient accessibility: The secret to these brownies lies in the perfect balance of cocoa powder, buttermilk, and food coloring, which gives them their distinctive blue velvet hue. Plus, you likely have most of the ingredients already stocked in your pantry.
- Ease of preparation: With a simple mix-and-bake method, these brownies are a breeze to prepare. No fancy equipment or complicated techniques required.
- Impressive results with minimal effort: Despite their ease of preparation, the Blue Velvet Brownies are sure to impress. The vibrant color and rich, fudgy texture make them a showstopper at any gathering.
Key Ingredients
The magic of the Blue Velvet Brownies comes down to a few key ingredients. You’ll need all-purpose flour, granulated sugar, unsweetened cocoa powder, buttermilk, large eggs, vegetable oil, vanilla extract, salt, and blue food coloring. For the best results, use high-quality cocoa powder and real buttermilk. If you don’t have buttermilk on hand, you can easily make a substitute by mixing 1 cup of milk with 1 tablespoon of white vinegar or lemon juice and letting it sit for 5-10 minutes.
Instructions
- Step 1: Preheat your oven to 350°F (180°C) and line an 8-inch square baking pan with parchment paper. In a medium bowl, whisk together the flour, sugar, and salt. Set aside.
- Step 2: In a large bowl, combine the cocoa powder and buttermilk. Whisk until smooth, then add the eggs one at a time, whisking well after each addition. Whisk in the vegetable oil and vanilla extract.
- Step 3: Add the flour mixture to the cocoa mixture, stirring until just combined. Add a few drops of blue food coloring until you achieve the desired shade of blue.
- Step 4: Pour the batter into the prepared baking pan and smooth the top. Bake for 20-25 minutes or until a toothpick inserted into the center comes out with a few moist crumbs attached. Let cool completely in the pan before cutting into squares and serving.
Handy Tips
- For an extra fudgy texture, don’t overbake. A slightly underbaked center is better than overcooking.
- Experiment with different shades of blue by adjusting the amount of food coloring. You can also add a teaspoon of violet food coloring to enhance the blue hue.
- Consider adding nuts, chocolate chips, or espresso powder to the batter for added texture and flavor.
Heat Control
When baking the brownies, it’s crucial to keep an eye on the temperature and timing. The ideal temperature is 350°F (180°C), and you should bake for 20-25 minutes. Check for doneness by inserting a toothpick into the center. If it comes out with a few moist crumbs, the brownies are ready. If not, bake for an additional 2-3 minutes and check again.
Crunch Factor
These brownies are designed to be fudgy and tender, rather than crunchy. To achieve the perfect texture, avoid overmixing the batter and don’t overbake. If you prefer a crunchier top, you can broil the brownies for an additional 30 seconds to 1 minute after baking. Keep a close eye to prevent burning.
Pro Kitchen Tricks
- For easier cleanup, line your baking pan with parchment paper or aluminum foil, leaving some overhang for easy removal.
- Use a high-quality food coloring that’s specifically designed for baking to achieve the most vibrant color.
- Consider making a double batch and freezing some for later. The brownies will keep for up to 3 months in an airtight container in the freezer.
Storage Tips
- Store the brownies in an airtight container at room temperature for up to 3 days.
- For longer storage, wrap the brownies individually in plastic wrap or aluminum foil and freeze for up to 3 months. Thaw at room temperature or reheat in the microwave for 10-15 seconds.
- Use an airtight container or zip-top bag to maintain freshness and prevent moisture from accumulating.
Gift Packaging Ideas
The Blue Velvet Brownies make a unique and thoughtful gift for friends, family, or coworkers. Consider packaging them in decorative tins, jars, or gift boxes lined with parchment paper or wax paper. You can also wrap individual brownies in cellophane bags or plastic wrap and tie with a ribbon or twine. Add a personal touch with a handwritten note or a sprinkle of edible glitter on top.
Flavor Variations
- Different spices: Try adding a pinch of salt, a teaspoon of espresso powder, or a sprinkle of cinnamon to the batter for added depth of flavor.
- Creative toppings: Top the brownies with chopped nuts, chocolate shavings, or a sprinkle of sea salt for added texture and visual appeal.
- Ingredient swaps: Substitute the buttermilk with almond milk or soy milk for a dairy-free version, or use gluten-free flour for a gluten-free option.
Troubleshooting
- Texture problems: If the brownies are too dry, try adding an extra tablespoon or two of buttermilk to the batter. If they’re too wet, bake for an additional 2-3 minutes and check again.
- Ingredient replacements: If you don’t have buttermilk, you can make a substitute by mixing 1 cup of milk with 1 tablespoon of white vinegar or lemon juice. Let it sit for 5-10 minutes before using.
- Over/undercooking signs: Keep an eye on the brownies while they’re baking, and check for doneness by inserting a toothpick into the center. If it comes out clean, the brownies are overcooked. If it comes out with a few moist crumbs, they’re perfect.
FAQs
- Can I freeze it? Yes, the brownies can be frozen for up to 3 months in an airtight container. Thaw at room temperature or reheat in the microwave for 10-15 seconds.
- Is it gluten-free? No, the recipe contains all-purpose flour, which contains gluten. However, you can substitute the flour with gluten-free flour for a gluten-free option.
- Can I double the recipe? Yes, you can easily double the recipe to make a larger batch of brownies. Simply multiply the ingredients and adjust the baking time as needed.
Conclusion
With the Blue Velvet Brownies recipe, you’ll be able to create a stunning and delicious dessert that’s sure to impress. Whether you’re a seasoned baker or a beginner, this recipe is easy to follow and requires minimal effort. So go ahead, get creative, and share your beautiful blue brownies with the world. Don’t be afraid to experiment with different flavors and toppings, and don’t hesitate to reach out if you have any questions or troubleshooting issues. Happy baking!