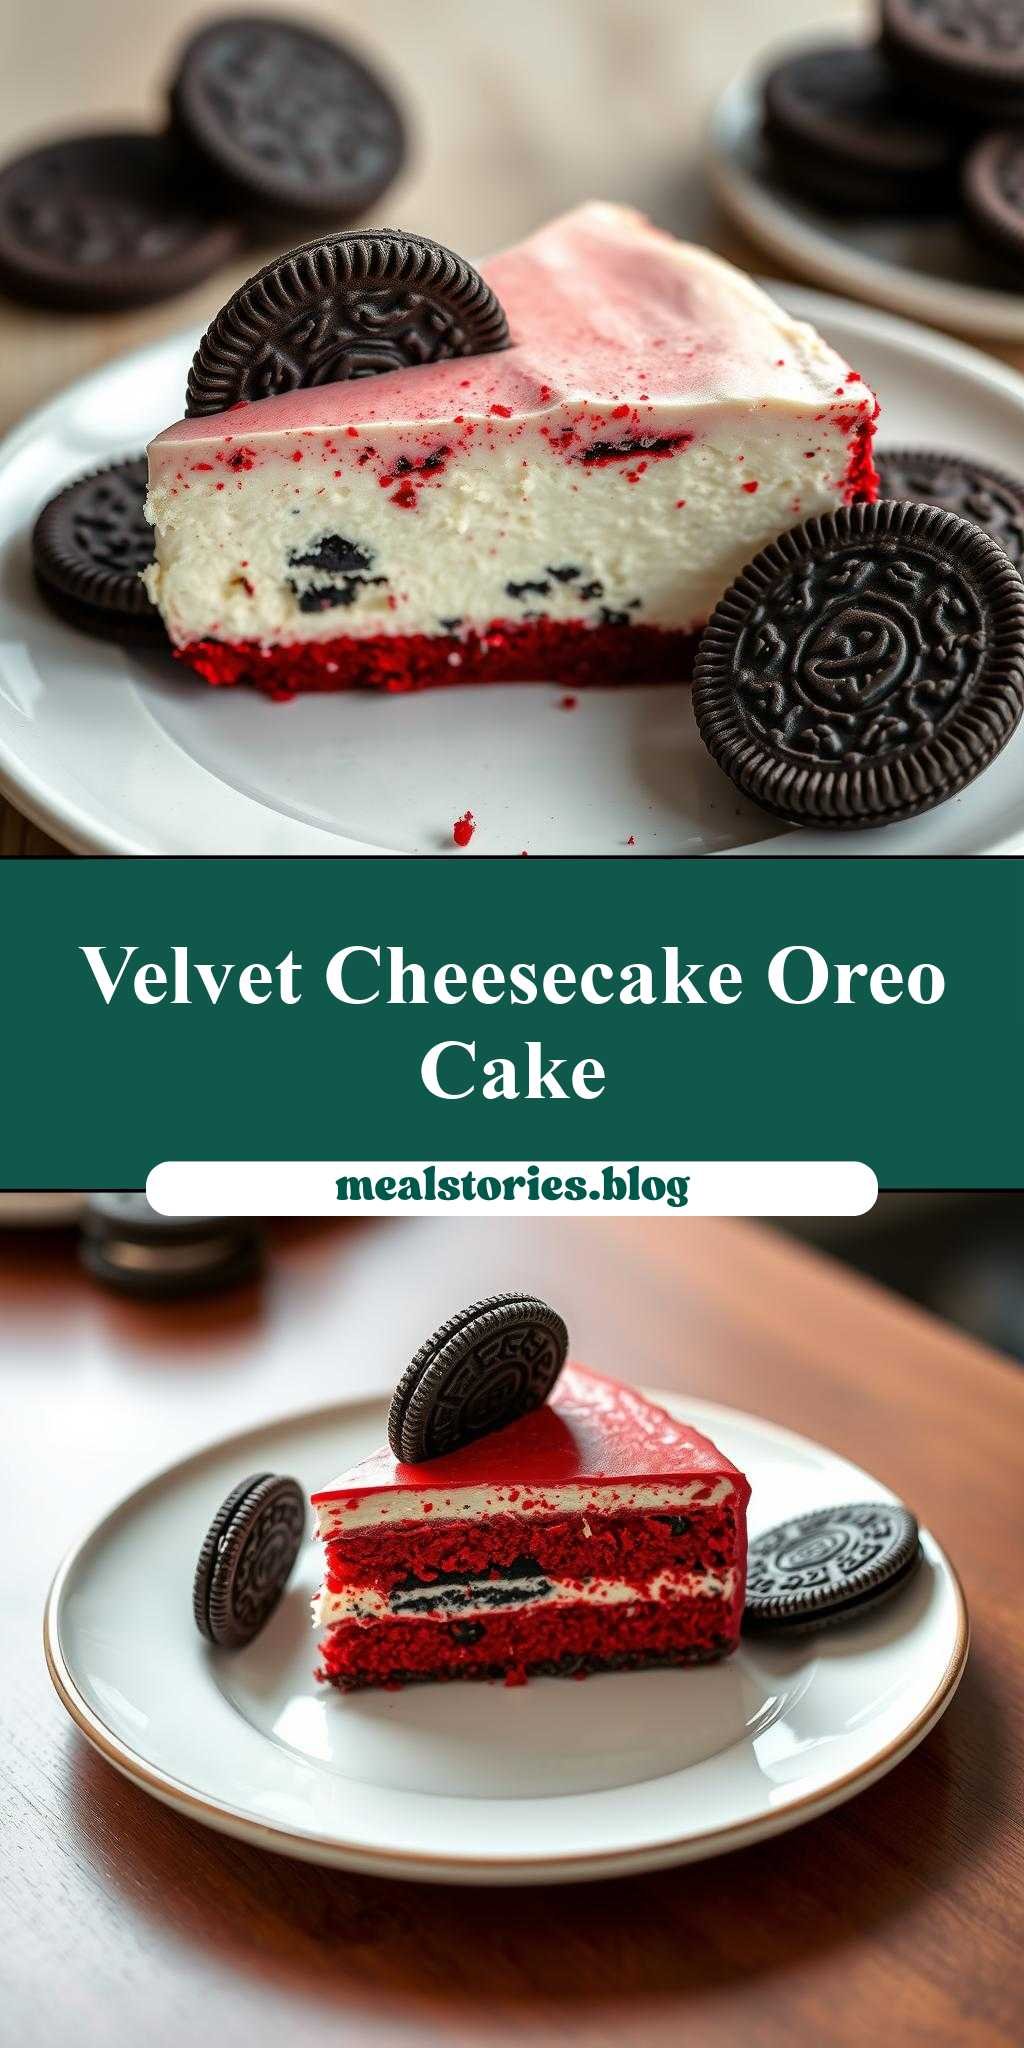
What makes the perfect dessert combination – is it the creamy cheesecake, rich red velvet cake or crunchy Oreo cookies? This homemade red velvet cheesecake cake with a twist of Oreo cookies is an easy and indulgent treat for any family gathering, featuring a moist cake and creamy cheesecake filling, Save this idea
red velvet cheesecake cake with oreo cookies
Introduction
Imagine a dessert that combines the richness of cheesecake, the decadence of red velvet cake, and the fun crunch of Oreo cookies. This red velvet cheesecake cake with Oreo cookies is not just a dessert, it’s an experience. It’s a masterpiece that’s surprisingly easy to make, using everyday ingredients that you might already have in your pantry. The best part? It’s incredibly versatile, allowing you to get creative with your favorite flavors and decorations. Whether you’re a seasoned baker or a beginner in the kitchen, this recipe is sure to impress your family and friends with its unique blend of textures and tastes.
Why This Works
- Flavor balance and ingredient accessibility: The combination of red velvet cake, cheesecake, and Oreo cookies creates a perfect balance of flavors that’s both familiar and exciting. Plus, the ingredients are easy to find in most grocery stores.
- Ease of preparation: Despite its impressive appearance, this dessert is relatively simple to prepare. It requires some planning, but the steps are straightforward, and the payoff is well worth the effort.
- Impressive results with minimal effort: The layering of the red velvet cake, cheesecake, and Oreo cookies creates a visually stunning dessert that’s perfect for special occasions or everyday indulgence. The best part is that it looks like it took hours to make, but it can be ready in under an hour.
Key Ingredients
To make this red velvet cheesecake cake with Oreo cookies, you’ll need a few key ingredients. For the red velvet cake, you’ll need flour, sugar, cocoa powder, and buttermilk. For the cheesecake, you’ll need cream cheese, eggs, and vanilla extract. And for the Oreo cookie layer, you’ll need a package of Oreos and some melted butter. You can also customize the recipe with your favorite flavors, such as adding nuts or chocolate chips to the cake or cheesecake layers. Some practical substitutions include using almond milk instead of buttermilk, or using gluten-free flour for a gluten-free version.
Instructions
- Step 1: Begin by preheating your oven to 350°F (180°C). Prepare your pans by greasing them with butter and flouring them. Then, chop your Oreos and set them aside for later use.
- Step 2: Next, mix the ingredients for your red velvet cake. In a large bowl, whisk together flour, sugar, cocoa powder, and baking powder. In a separate bowl, whisk together buttermilk, eggs, and food coloring. Add the wet ingredients to the dry ingredients and mix until just combined. Pour the batter into your prepared pans and bake for 20-25 minutes, or until a toothpick inserted into the center comes out clean.
- Step 3: While the cakes are baking, prepare your cheesecake layer. In a blender or food processor, blend together cream cheese, eggs, and vanilla extract until smooth. Pour the cheesecake batter into a separate pan and bake for 20-25 minutes, or until the edges are set and the center is just slightly jiggly.
- Step 4: Once the cakes and cheesecake are cool, it’s time to assemble the dessert. Place one of the red velvet cakes on a serving plate, followed by a layer of cheesecake, and then a layer of Oreos. Repeat this process until all of the ingredients have been used, ending with a layer of Oreos on top. Drizzle with melted butter and refrigerate until ready to serve.
Handy Tips
- To ensure that your cakes and cheesecake are evenly baked, make sure to rotate your pans halfway through the baking time.
- If you find that your Oreos are getting crushed or broken, try freezing them for a few minutes before chopping them. This will help them hold their shape and prevent them from becoming too crumbly.
- Don’t overmix your batter or cheesecake mixture, as this can result in a dense or tough texture. Stop mixing as soon as the ingredients are just combined, and then let the mixtures rest for a few minutes before pouring them into your pans.
Heat Control
If you’re using a conventional oven, make sure to preheat it to 350°F (180°C) before baking your cakes and cheesecake. If you’re using a convection oven, you may need to adjust the temperature and baking time accordingly. To ensure that your desserts are evenly baked, rotate your pans halfway through the baking time. You can also check for doneness by inserting a toothpick into the center of the cake or cheesecake. If it comes out clean, the dessert is ready. If not, bake for a few more minutes and check again.
Crunch Factor
The crunch factor in this dessert comes from the Oreo cookies, which add a fun texture contrast to the soft and creamy cheesecake and cake. To achieve the perfect crunch, make sure to chop your Oreos finely and sprinkle them evenly over the top of the dessert. You can also try using different types of cookies or wafers, such as chocolate sandwich cookies or peanut butter cookies, to create a unique flavor and texture combination.
Pro Kitchen Tricks
- To prevent your cakes and cheesecake from cracking or breaking, make sure to cool them completely in the pans before removing them and assembling the dessert.
- If you find that your dessert is too sweet, try reducing the amount of sugar in the recipe or using a different type of sugar, such as brown sugar or honey.
- To add an extra layer of flavor and moisture to your dessert, try brushing the cakes and cheesecake with a simple syrup or liqueur, such as Grand Marnier or Kahlua, before assembling the dessert.
Storage Tips
- To store your dessert, wrap it tightly in plastic wrap or aluminum foil and refrigerate for up to 3 days.
- If you want to freeze your dessert, wrap it tightly in plastic wrap or aluminum foil and place it in a freezer-safe bag. Frozen desserts can be stored for up to 2 months.
- To reheat your dessert, simply thaw it overnight in the refrigerator and then let it come to room temperature before serving. You can also reheat it in the microwave or oven, but be careful not to overheat it, as this can cause the cheesecake to melt or the cake to become dry.
Gift Packaging Ideas
If you want to give your dessert as a gift, consider packaging it in a decorative tin or box, or wrapping it in colorful paper or fabric. You can also add a personal touch by including a handwritten note or card with the recipe and baking instructions. Some other ideas include packaging the dessert in a mason jar or glass container, or creating a dessert gift basket filled with a variety of sweet treats.
Flavor Variations
- Different spices: Try adding a pinch of cinnamon or nutmeg to the cake or cheesecake batter for an extra boost of flavor.
- Creative toppings: Consider adding fresh fruit, nuts, or chocolate shavings to the top of the dessert for a unique flavor and texture combination.
- Ingredient swaps: If you’re looking for a gluten-free or vegan version of the recipe, try substituting the flour with gluten-free flour or the eggs with a flax egg.
Troubleshooting
- Texture problems: If your cake or cheesecake is too dense or dry, try adjusting the recipe by adding more liquid or using a different type of flour.
- Ingredient replacements: If you’re missing an ingredient, try substituting it with a similar ingredient or omitting it altogether. For example, if you don’t have buttermilk, you can make a substitute by mixing milk with vinegar or lemon juice.
- Over/undercooking signs: If your cake or cheesecake is overcooked, it may be dry or cracked. If it’s undercooked, it may be soft or jiggly. To avoid these problems, make sure to check the dessert frequently while it’s baking and adjust the baking time as needed.
FAQs
- Can I freeze it? Yes, you can freeze the dessert for up to 2 months. Simply wrap it tightly in plastic wrap or aluminum foil and place it in a freezer-safe bag.
- Is it gluten-free? No, the recipe contains gluten due to the presence of wheat flour. However, you can try substituting the flour with gluten-free flour to make a gluten-free version.
- Can I double the recipe? Yes, you can double the recipe to make a larger dessert. Simply multiply all of the ingredients by two and adjust the baking time as needed.
Conclusion
This red velvet cheesecake cake with Oreo cookies is a show-stopping dessert that’s sure to impress your family and friends. With its unique combination of flavors and textures, it’s perfect for special occasions or everyday indulgence. Whether you’re a seasoned baker or a beginner in the kitchen, this recipe is easy to follow and requires minimal effort. So go ahead, get creative, and enjoy the ooohs and ahhhs as you serve this stunning dessert. Don’t be afraid to experiment with different flavors and ingredients, and don’t hesitate to reach out if you have any questions or need further guidance. Happy baking!