Can you resist a moist homemade cake topped with Oreos and drizzled with rich red icing? This easy dessert is perfect for a family favorite weeknight treat, made with simple ingredients like crushed cookies and creamy icing. Save this idea for a quick sweet fix later.
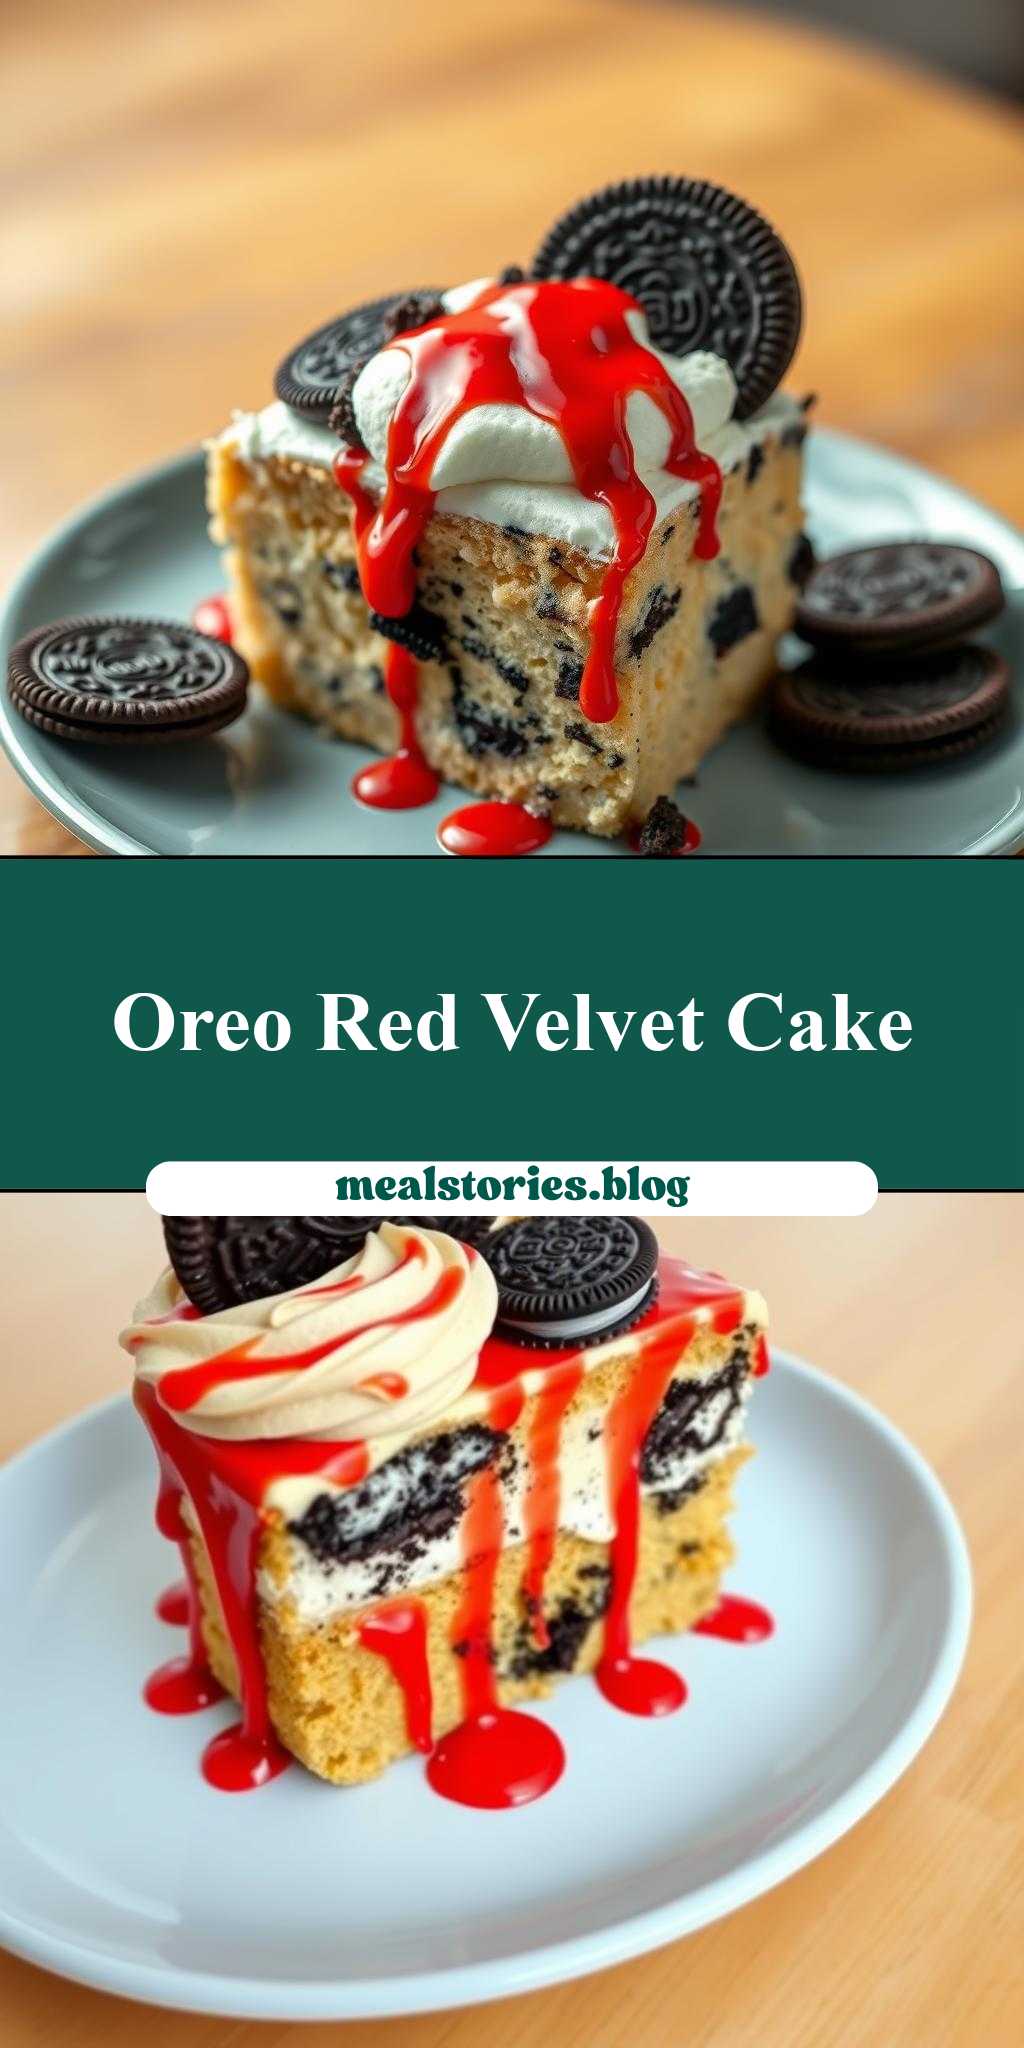
a cake with oreo cookies on top and red icing drizzled over it
Introduction
Imagine a moist and decadent cake, topped with the unmistakable crunch of Oreo cookies and finished with a drizzle of vibrant red icing, creating a visual masterpiece that’s as delicious as it is Instagram-worthy. This dessert is not just a treat for the taste buds, but a testament to creativity in the kitchen, using everyday ingredients to achieve an impressive result. The best part? It’s remarkably easy to make, requiring minimal effort for a dessert that’s sure to impress both kids and adults alike. Whether you’re a seasoned baker or a beginner in the kitchen, this cake with Oreo cookies on top and red icing drizzled over it is a perfect project to undertake, promising flavor, fun, and a touch of elegance to any gathering or special occasion.
Why This Works
- Flavor balance and ingredient accessibility: The combination of a rich cake, the distinctive taste of Oreos, and the sweetness of red icing strikes a perfect balance of flavors. Moreover, all the ingredients are easily accessible in most supermarkets, making this cake a practical choice for any baker.
- Ease of preparation: Despite its impressive appearance, this cake is surprisingly easy to prepare. The steps are straightforward, and the use of store-bought Oreos simplifies the process, reducing the time and effort needed to achieve a stunning dessert.
- Impressive results with minimal effort: The magic of this recipe lies in its ability to deliver an impressive, professionally-looking dessert with minimal fuss. The Oreo topping and red icing drizzle are the crowning touches that elevate a simple cake into a showstopper, perfect for birthdays, holidays, or any celebration.
Key Ingredients
The main ingredients for this cake include all-purpose flour, granulated sugar, unsalted butter, eggs, vanilla extract for the cake, and of course, Oreo cookies for the topping. For the red icing, you’ll need powdered sugar, a small amount of milk or cream, and red food coloring. Practical substitutions can be made for some ingredients, such as using salted butter and omitting added salt, or substituting vanilla extract with almond extract for a different flavor dimension. The Oreos can also be crushed and mixed into the cake batter for an Oreo-infused cake, offering versatility to the recipe.
Instructions
- Step 1: Begin by preheating your oven to 350°F (175°C). Prepare your cake pans by greasing them and dusting with flour. In a large mixing bowl, whisk together the flour, sugar, and a pinch of salt. In another bowl, whisk the butter, eggs, and vanilla extract until well combined. Gradually add the dry ingredients to the wet ingredients, mixing until just combined.
- Step 2: Divide the cake batter evenly between the prepared pans and smooth the tops. Bake for approximately 20-25 minutes, or until a toothpick inserted into the center comes out clean. Allow the cakes to cool completely in the pans before proceeding.
- Step 3: Once the cakes are cool, you can start assembling the dessert. Place one cake layer on a serving plate or cake stand. If desired, you can frost the top of this layer with a simple buttercream or whipped cream to act as a base for the Oreos. Arrange the Oreo cookies on top of the cake. You can leave them whole for a more rustic look or crush them slightly for better adhesion.
- Step 4: For the red icing, mix the powdered sugar, milk, and red food coloring in a small bowl until smooth and creamy. Adjust the consistency and color as needed. Drizzle the red icing over the Oreos, allowing it to set before serving. This final touch not only adds a pop of color but also ties the whole dessert together, making it visually appealing and irresistible.
Handy Tips
- A helpful tip is to ensure your ingredients, especially the butter and eggs, are at room temperature before starting. This will make the mixing process easier and result in a better-textured cake. Also, don’t overmix the batter, as this can lead to a dense cake. For the red icing, start with a small amount of milk and add more as needed to achieve the right consistency for drizzling.
Heat Control
If you’re baking the cake from scratch, ideal heat control is crucial. The oven should be preheated to 350°F (175°C), and the cake should be baked for 20-25 minutes. Signs of doneness include the cake pulling away from the sides of the pan, a toothpick inserted into the center coming out clean, and the top being golden brown. Keep an eye on the cake after the 20-minute mark, as oven times can vary.
Crunch Factor
The crunch factor in this dessert comes from the Oreo cookies on top. To maintain their crunch, it’s best to add them just before serving. If you’re using crushed Oreos, you can sprinkle them on top of a lightly frosted cake or mix them into the batter for an added texture throughout the cake. Achieving the right crunch is about balance; you want enough Oreos to provide texture without overwhelming the other components of the dessert.
Pro Kitchen Tricks
- One expert tip is to use a turntable to display your cake, especially if you’re drizzling icing over it. This allows for an even drizzle and makes the cake look more professional. Another trick is to chill your cake in the refrigerator for about 10 minutes before adding the Oreos and icing. This helps the cake to set and makes it easier to handle and decorate.
Storage Tips
Gift Packaging Ideas
If you’re considering gifting this cake, there are several creative ways to package it. One idea is to place the cake on a decorative cake stand or plate, wrap it in clear plastic or a large cellophane bag, and tie a ribbon around it. You could also use a large, sturdy gift box designed for cakes, lining it with decorative paper or a cake pad for protection and visual appeal. Adding a personal touch, like a handwritten card or a small gift, can make the presentation even more special.
Flavor Variations
- Different spices: Consider adding a pinch of salt or a teaspoon of cinnamon to the cake batter for added depth of flavor. Other spices like nutmeg or cardamom can also complement the sweetness of the cake and the Oreos.
- Creative toppings: Beyond Oreos, you can experiment with other cookies or candies. M&M’s, chopped nuts, or even dried fruits can add interesting textures and flavors. For a more adult version, a drizzle of caramel or chocolate sauce can elevate the dessert.
- Ingredient swaps: For a gluten-free version, substitute the all-purpose flour with a gluten-free flour mix. You can also use almond milk or another non-dairy milk for a dairy-free cake. Swapping the butter with a vegan alternative can make the cake suitable for vegan diets.
Troubleshooting
- Texture problems: If your cake turns out too dense, it might be due to overmixing the batter. Try to mix the ingredients just until they come together. If the cake is too dry, it could be overbaked; check your oven temperature and baking time.
- Ingredient replacements: If you’re missing an ingredient, there are often substitutions you can make. For example, if you don’t have buttermilk, you can make a substitute by mixing milk with vinegar or lemon juice and letting it sit for a few minutes.
- Over/undercooking signs: Keep an eye on your cake while it’s baking. If it’s undercooked, it will be soggy in the center. If it’s overcooked, it will be dry and possibly cracked on top. Adjust your baking time as needed based on your oven’s performance.
FAQs
- Can I freeze it? Yes, you can freeze the cake before decorating. It’s best to freeze it without the Oreos and icing, then thaw and decorate when you’re ready to serve.
- Is it gluten-free? The original recipe is not gluten-free, but you can make it gluten-free by substituting the flour with a gluten-free flour mix.
- Can I double the recipe? Yes, you can double the recipe to make a larger cake. Just keep in mind that you’ll need to adjust the baking time accordingly, possibly adding 10-15 minutes to the total baking time.
Conclusion
Making a cake with Oreo cookies on top and red icing drizzled over it is a fun and rewarding baking project that’s perfect for anyone looking to create a delicious and visually stunning dessert. With its ease of preparation, accessibility of ingredients, and the impressive results it yields, this cake is sure to become a favorite. Whether you’re baking for a special occasion or just a sweet treat, this dessert is adaptable, allowing you to experiment with different flavors and toppings. So, go ahead, get creative, and enjoy the process of making something truly special and delicious. Happy baking!