What happens when you combine your favorite desserts on one plate? A match made in heaven, that’s what. With quick and easy homemade treats like chocolate cake and vanilla pudding, weeknight dinners just got a whole lot sweeter. Rich chocolate and creamy pudding are the stars of this show. Save this idea for a family favorite dessert night.
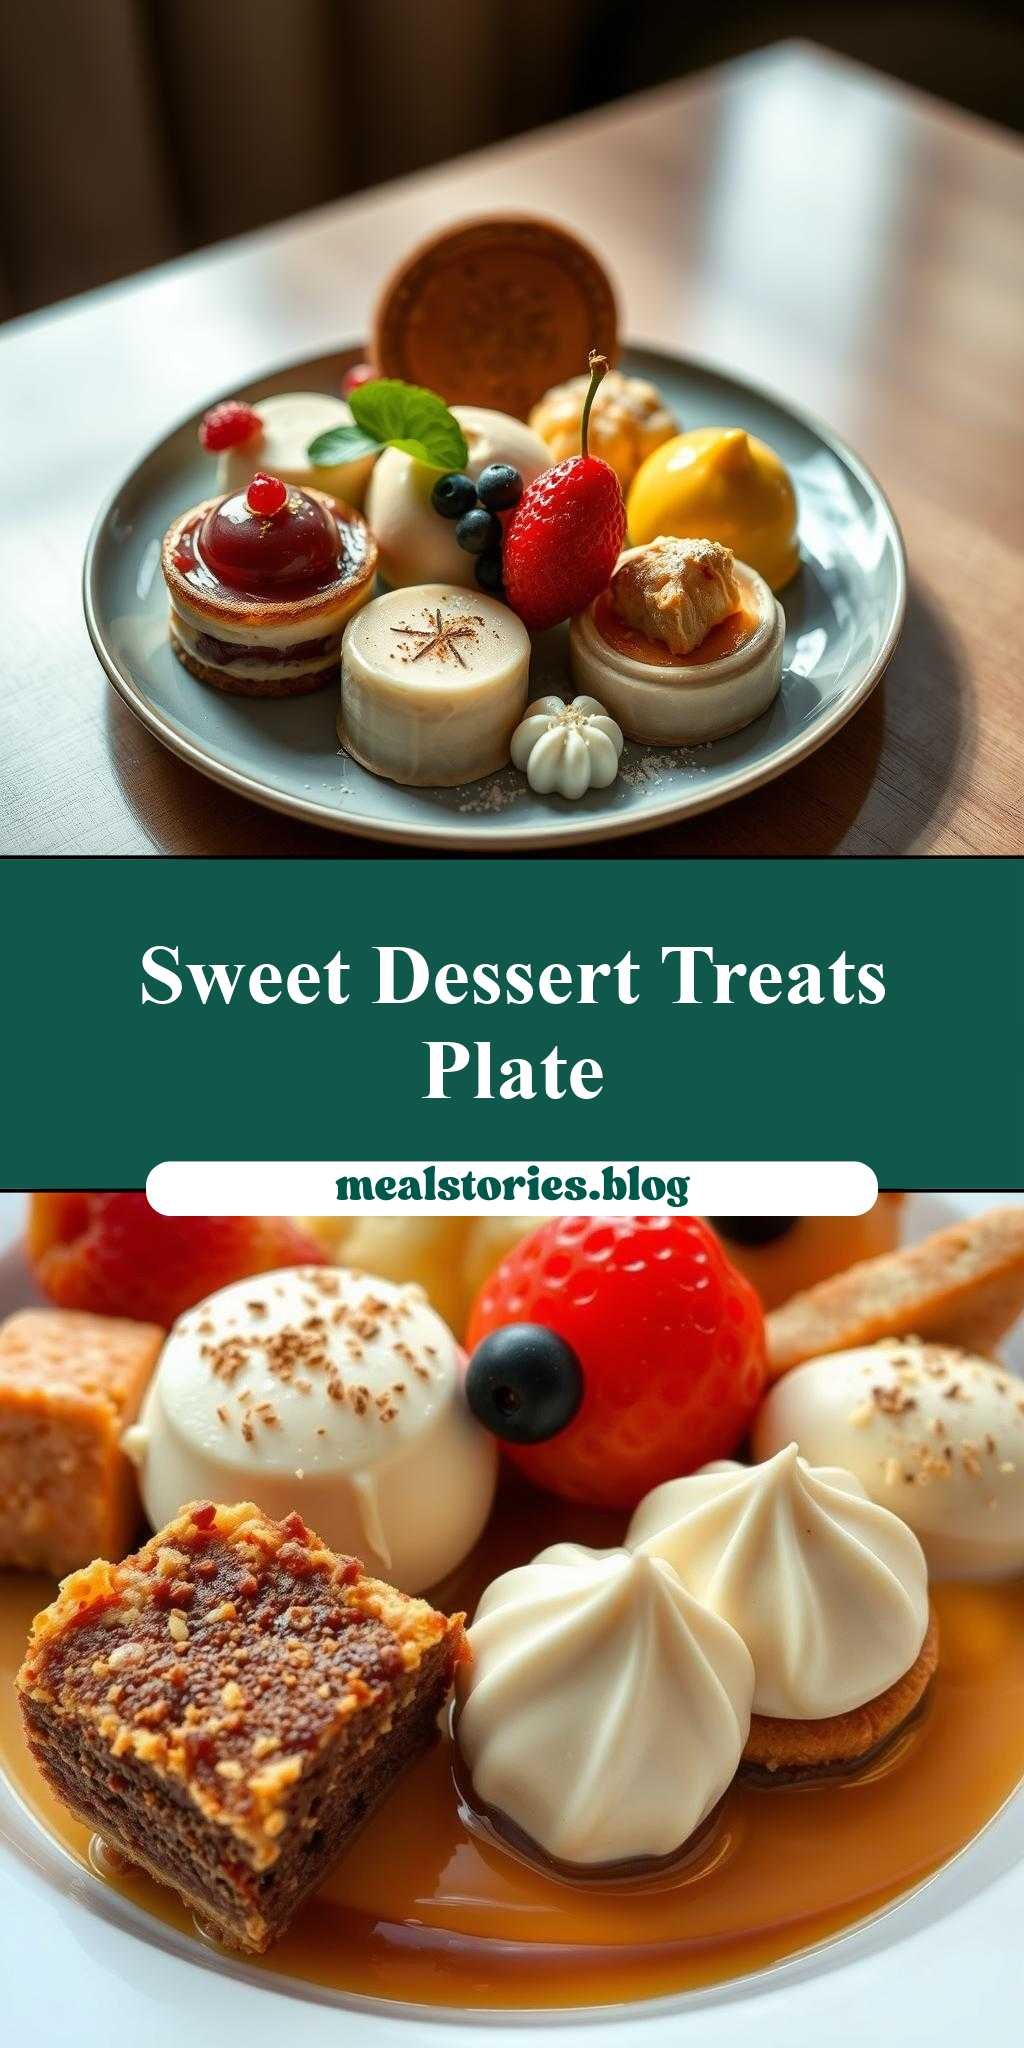
there are many desserts on the plate together
Introduction
Imagine a dessert plate that’s a symphony of colors, textures, and flavors, all coming together in perfect harmony. “There are many desserts on the plate together” is more than just a dish; it’s an experience. This creative dessert platter combines the ease of using everyday ingredients with the flair of presenting multiple desserts as one cohesive masterpiece. Whether you’re a beginner in the kitchen or an experienced chef, this recipe is designed to impress with its simplicity and versatility. By bringing together a selection of mini desserts, you’ll not only create a visually stunning presentation but also cater to a variety of tastes, ensuring that every guest finds something they love.
Why This Works
- Flavor balance and ingredient accessibility: The beauty of this dessert platter lies in its ability to balance a range of flavors and textures, using ingredients that are readily available in most supermarkets.
- Ease of preparation: Each dessert component is relatively simple to prepare, and by making them in mini form, you reduce cooking and preparation time significantly.
- Impressive results with minimal effort: Despite its simplicity, the final presentation is impressive and perfect for special occasions or dinner parties, giving the illusion of much more labor-intensive preparation.
Key Ingredients
The key to a successful “there are many desserts on the plate together” platter is variety. Consider including a mix of classic desserts like mini cheesecakes, chocolate truffles, fruit tarts, brownies, and macarons. For each of these desserts, you’ll need basic baking ingredients such as flour, sugar, eggs, and butter, along with dessert-specific ingredients like cream cheese for cheesecakes, high-quality chocolate for truffles, and fresh fruits for tarts. Practical substitutions can be made based on dietary restrictions or preferences, such as using almond flour for gluten-free options or vegan chocolate for truffles.
Instructions
- Step 1: Begin by planning your desserts and making a list of the ingredients you need. Prep work includes measuring out ingredients, chopping nuts or fruits, and melting chocolate.
- Step 2: Cook or mix the base ingredients for each dessert. This might involve baking cake bases for cheesecakes, mixing batter for brownies, or preparing pastry dough for tarts.
- Step 3: Layer flavors or textures within each dessert. For example, adding a fruit topping to cheesecakes, dipping truffles in melted chocolate, or filling tarts with a fruit curd.
- Step 4: Final touches and plating. Arrange your mini desserts on a large platter or individual plates in a visually appealing way. Consider adding garnishes like fresh herbs, edible flowers, or chocolate shavings to enhance the presentation.
Handy Tips
- To ensure your platter looks its best, consider the color and texture of each dessert and how they complement each other. Balance rich desserts like brownies with lighter options like fruit tarts.
- For desserts that require baking, make sure to not overbake, as mini desserts can quickly go from perfectly cooked to burnt.
- Prepare components ahead of time where possible, but assemble the platter just before serving to keep everything fresh and appealing.
Heat Control
For baked goods, maintaining the right oven temperature is crucial. Most mini desserts bake well at 350°F (175°C), but check the specific recipe for each dessert as some may require higher or lower temperatures. Keep an eye on the desserts as they bake, as their small size means they can quickly overcook. Signs of doneness include a toothpick coming out clean for cakes, a slight firmness to the touch for cheesecakes, and a golden brown color for pastry.
Crunch Factor
Achieving the right texture, whether it’s crunch, chew, or smoothness, depends on the dessert. For crunchy elements like nuts or biscotti, baking until golden and then cooling completely is key. For chewy desserts like brownies, removing them from the oven while still slightly undercooked and then letting them cool in the pan helps retain moisture.
Pro Kitchen Tricks
- Use parchment paper or silicone mats when baking to prevent sticking and make cleanup easier.
- For a uniform size and shape, use mini muffin tins or cookie scoops for desserts like cheesecakes and truffles.
- Keep your workspace organized by preparing each dessert’s ingredients and tools separately before starting to cook or assemble.
Storage Tips
- Store each dessert component separately in airtight containers to maintain freshness. Most baked goods keep well at room temperature for a day or two, while others like cheesecakes and truffles might require refrigeration.
- For longer storage, consider freezing. Most desserts freeze well, but it’s essential to wrap them tightly in plastic wrap or aluminum foil and then place them in a freezer-safe bag.
- When reheating or thawing frozen desserts, do so gently to prevent damage. Room temperature thawing or a short stint in a low-temperature oven (around 200°F or 90°C) works well for most desserts.
Gift Packaging Ideas
If you’re considering gifting your “there are many desserts on the plate together” platter, presentation is everything. Use a decorative platter or individual boxes that can be personalized with ribbons or gift tags. For a more rustic look, consider a wooden board or a basket lined with parchment paper or a tea towel. Adding a handwritten note with the ingredients used or a personal message makes the gift even more special.
Flavor Variations
- Different spices: Experiment with unique spice blends like cinnamon and nutmeg for a warm, autumnal feel, or cardamom and rosewater for a more exotic taste.
- Creative toppings: Offer a variety of toppings like fresh fruits, nuts, chocolate shavings, or caramel sauce to let each guest customize their dessert experience.
- Ingredient swaps: Substitute traditional ingredients with alternatives to cater to different tastes or dietary needs. Examples include using vegan chocolate, gluten-free flours, or sugar substitutes.
Troubleshooting
- Texture problems: If your desserts end up too hard or too soft, adjust baking times or ingredient ratios in future batches. For example, overmixing batter can lead to tough desserts, while underbaking can result in soft or raw centers.
- Ingredient replacements: When substituting ingredients, especially in baking, it’s crucial to understand the role of each ingredient. For instance, replacing butter with oil can affect the texture and flavor significantly.
- Over/undercooking signs: Keep an eye out for visual cues like coloring, firmness, and the smell of the desserts. Overcooked desserts might be too dark or have a burnt smell, while undercooked ones might be too pale or soft to the touch.
FAQs
- Can I freeze it? Yes, most desserts can be frozen, but it’s essential to follow proper freezing and thawing procedures to maintain quality and texture.
- Is it gluten-free? Depending on the desserts you choose to include, it’s possible to make a gluten-free version by substituting traditional flours with gluten-free alternatives.
- Can I double the recipe? Yes, you can easily scale up the recipe for larger gatherings. Just ensure you have enough baking sheets and storage containers for the increased quantity.
Conclusion
“There are many desserts on the plate together” is a versatile and impressive dessert solution for any occasion. By combining simplicity, creativity, and a variety of flavors and textures, you can create a truly memorable dining experience. Don’t be afraid to experiment and make the recipe your own, and remember, the key to success lies in the details, from preparation to presentation. Whether you’re a seasoned baker or a culinary newbie, this dessert platter is sure to delight and inspire, offering a sweet conclusion to any meal.