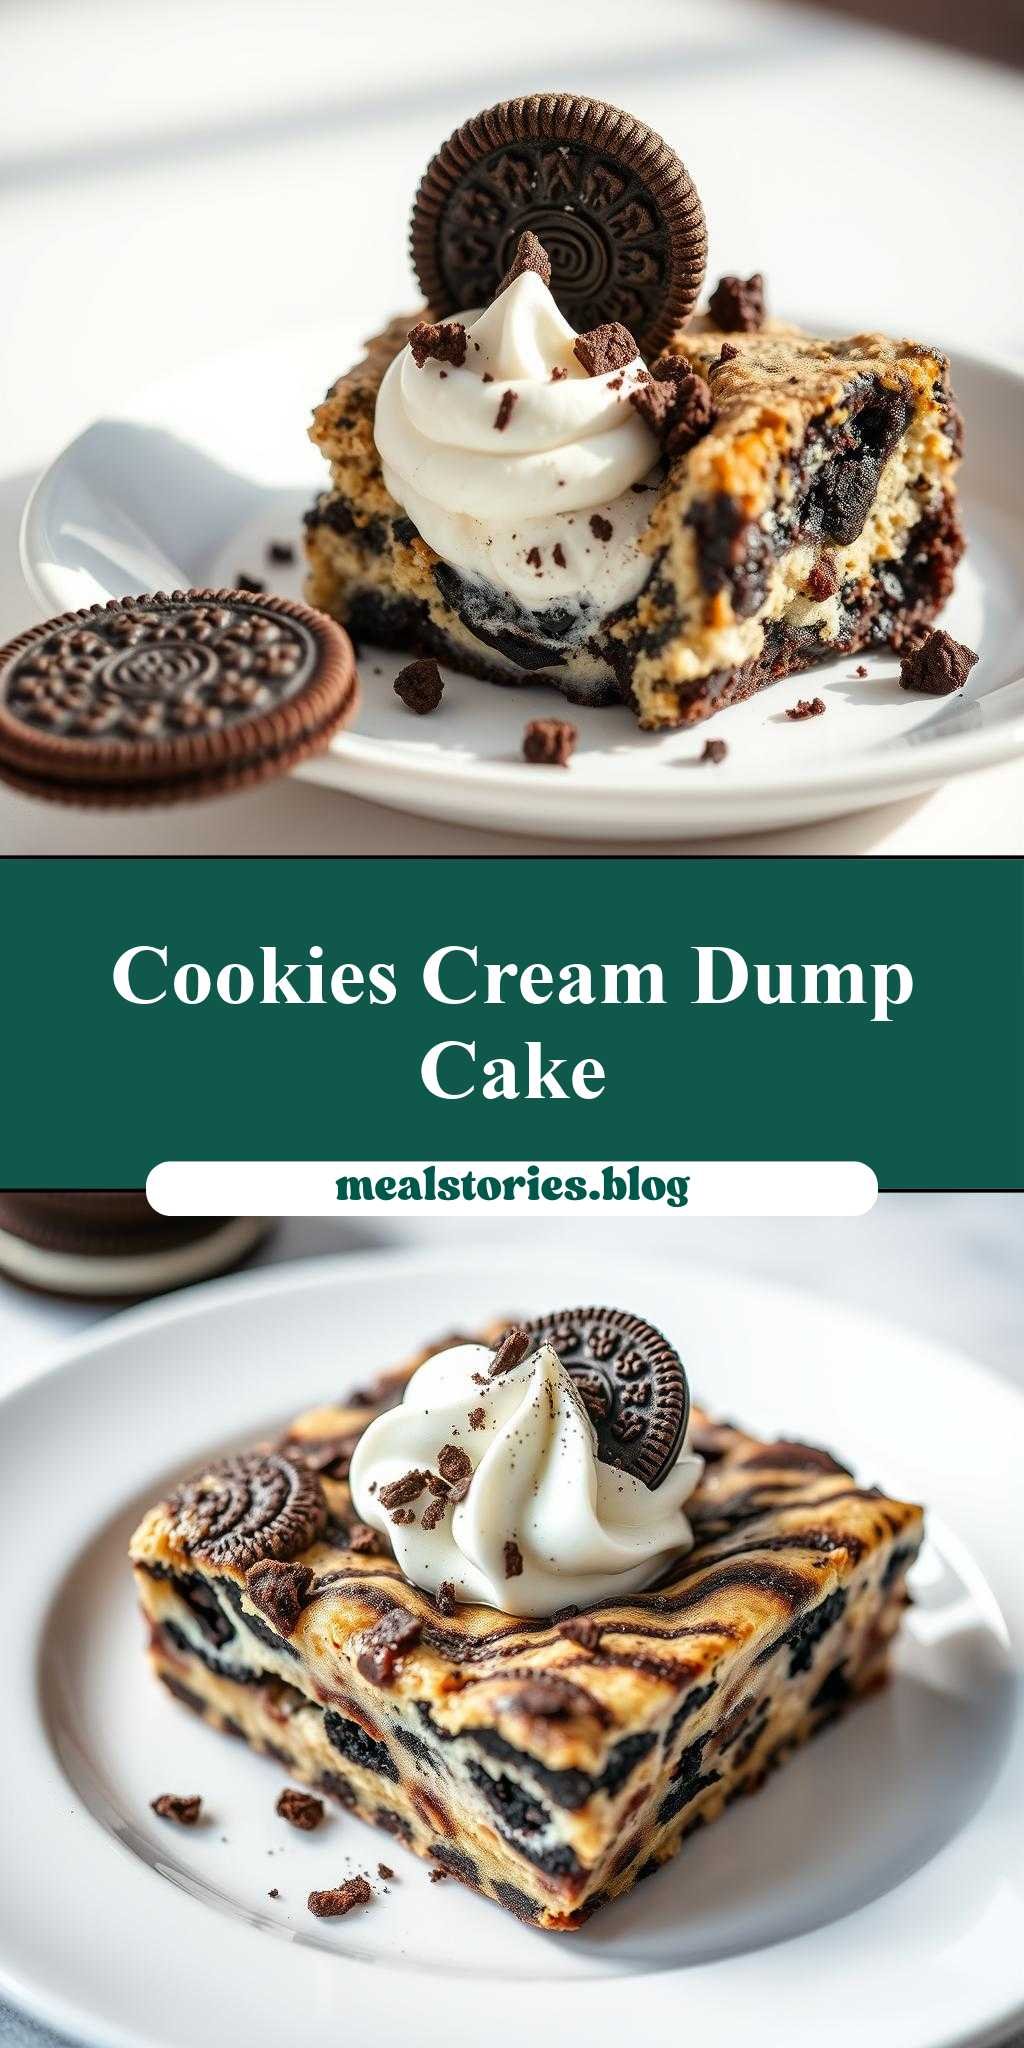
What makes an Oreo dump cake truly irresistible? This easy homemade dessert features a cookies and cream filling, made simple with a quick mix of crushed Oreos and sweet vanilla. Save this idea for a family favorite weeknight treat.
an oreo dump cake on a white plate with cookies and cream in the middle
Introduction
Imagine a dessert so divine, it combines the essence of Oreos, the creaminess of cookies and cream, and the simplicity of a dump cake, all presented elegantly on a white plate. This Oreo dump cake is not just a dessert; it’s an experience. It’s about taking everyday ingredients and turning them into something extraordinary with minimal fuss. The beauty of this recipe lies in its ease, flavor, and the creativity it allows. Whether you’re a beginner in the kitchen or a seasoned baker, this dessert is sure to impress your family and friends with its rich, velvety texture and the unmistakable taste of Oreos.
Why This Works
- Flavor balance and ingredient accessibility: The combination of Oreos and cookies and cream filling provides a perfect balance of flavors, and the ingredients are easily accessible in most grocery stores.
- Ease of preparation: The dump cake method simplifies the baking process, requiring minimal preparation and no intricate baking skills.
- Impressive results with minimal effort: Despite its simplicity, the end result is a visually appealing and delicious dessert that looks like it required much more effort than it actually did.
Key Ingredients
The main ingredients for this Oreo dump cake include a package of Oreo cookies, a can of condensed milk, a box of cake mix (preferably chocolate or vanilla to complement the Oreos), a stick of butter, and a tub of cookies and cream ice cream or frosting for the filling. For practical substitutions, you can use different types of cake mix or experiment with various ice cream flavors, but the core ingredients like Oreos and condensed milk are essential for the authentic taste and texture.
Instructions
- Step 1: Begin by preheating your oven to 350°F (175°C). Crush a significant portion of the Oreos in a bag or with a food processor to create a crust-like texture for the bottom of your baking dish.
- Step 2: Mix the crushed Oreos with melted butter until well combined, then press this mixture into the bottom of a 9×13 inch baking dish. Bake this crust in the oven for about 10 minutes, or until it’s lightly browned.
- Step 3: While the crust is baking, prepare your cake mix according to the box instructions, but instead of using the recommended amount of water, use a can of condensed milk. This will add a rich, creamy flavor to your cake. Once the crust is ready, pour the cake mixture over it and return it to the oven for about 25-30 minutes, or until a toothpick inserted into the center comes out clean.
- Step 4: Remove the cake from the oven and let it cool completely. Once cooled, use a sharp object to create holes across the top of the cake. Fill these holes with cookies and cream ice cream or frosting, creating a marbled effect. You can also top the cake with additional crushed Oreos or whipped cream for extra decoration.
Handy Tips
- Ensure your cake is completely cooled before adding the cookies and cream filling to prevent melting and to achieve the best texture.
- Experiment with different types of ice cream or frosting for the filling to change up the flavor profile of your dessert.
- For an extra crunchy topping, sprinkle some crushed Oreos or chopped nuts over the whipped cream or ice cream before serving.
Heat Control
The ideal temperature for baking the crust and the cake is 350°F (175°C). For the crust, bake for 10 minutes or until lightly browned. For the cake, bake for 25-30 minutes or until a toothpick inserted into the center comes out clean. Keep an eye on your cake to avoid overcooking, as the edges can quickly become too dark.
Crunch Factor
The crunch in this dessert comes from the Oreo crust and any additional toppings like nuts or extra Oreos. To achieve the perfect crunch, ensure the crust is baked until it’s lightly browned, and consider adding a layer of crushed cookies or nuts on top of the whipped cream or ice cream before serving.
Pro Kitchen Tricks
- Use a high-quality cake mix that complements the flavor of Oreos for the best results.
- Don’t overmix the cake batter, as this can lead to a dense cake.
- For a shortcut, use pre-crushed Oreos or cookie crumbs for the crust.
Storage Tips
- Store any leftovers in the refrigerator, covered tightly with plastic wrap or aluminum foil, for up to 3 days.
- For longer storage, consider freezing the cake without the ice cream topping. When you’re ready to serve, thaw and add your preferred topping.
- Use airtight containers to keep the cake fresh and prevent it from absorbing odors from the fridge.
Gift Packaging Ideas
This Oreo dump cake can be a thoughtful gift for friends and family, especially during holidays or special occasions. Consider packaging it in a decorative tin or a gift box, topped with a bow and a gift card. For a more personalized touch, write a recipe card with the ingredients and instructions, and include it with the gift. If you’re gifting just the cake without the ice cream topping, you can also include a pint of cookies and cream ice cream on the side, along with some whipped cream and crushed Oreos for decoration.
Flavor Variations
- Different spices: Adding a pinch of salt or a teaspoon of vanilla extract can enhance the flavor of the cake.
- Creative toppings: Experiment with different ice cream flavors, nuts, or even candy pieces to create unique variations.
- Ingredient swaps: Try using different types of cookies for the crust, like peanut butter cookies or chocolate sandwich cookies, for a different twist.
Troubleshooting
- Texture problems: If the cake turns out too dense, it might be due to overmixing the batter. If it’s too dry, it could be overcooked.
- Ingredient replacements: If you can’t find cookies and cream ice cream, you can substitute it with a similar flavor or make your own by mixing vanilla ice cream with crushed Oreos.
- Over/undercooking signs: Keep an eye on the cake while it’s baking. If the edges start to brown too quickly, cover the dish with foil to prevent burning.
FAQs
- Can I freeze it? Yes, you can freeze the cake without the ice cream topping for up to 2 months. When you’re ready to serve, thaw and add your preferred topping.
- Is it gluten-free? Depending on the cake mix used, this dessert might not be gluten-free. Look for gluten-free cake mix options to accommodate dietary restrictions.
- Can I double the recipe? Yes, you can double the recipe, but ensure you have a large enough baking dish to accommodate the increased volume.
Conclusion
This Oreo dump cake is a masterpiece of simplicity and flavor, perfect for any occasion. With its easy preparation, impressive presentation, and delicious taste, it’s sure to become a favorite among your friends and family. Feel free to experiment with different variations and toppings to make it your own, and don’t hesitate to share your creations and tips with others. Whether you’re a seasoned baker or just starting out, this recipe is a must-try for anyone with a sweet tooth and a love for Oreos.